Did you make a series of unfortunate commits? Learn how to clean up your nonsense.
I build a lot of public experimental demo repos to support my tutorials, and I often encourage people to fork them and deploy them to Netlify to try things out. The problem is, these experimental repos can often come with a terribly messy git history — and I don't want people to inherit that. And so, before I publish and promote a demo project, I like to clean up the git history ✨.
First, the TL;DR: use these four commands — with caution (more on this later!) — and enjoy a tidy ship.
# 1. Reset the repo to the initial commit, preserving the current state of the files on your local machine
git reset --soft {INITIAL_COMMIT_HASH}

# 2. Stage all files
git add .

# 3. Make a commit
git commit -m "Initial commit"

# 4. Force push to the origin
git push --force
Let's look in detail at what each command does.
Soft reset to the initial commit
Each time you push a change to git, a unique identifier called a commit hash is generated from various bits of data associated with the commit, such as the commit message, file changes, commit author and date. Commit hashes point to the state of the repository when the commit was made, and allow us to move back and forward in time in the repository.
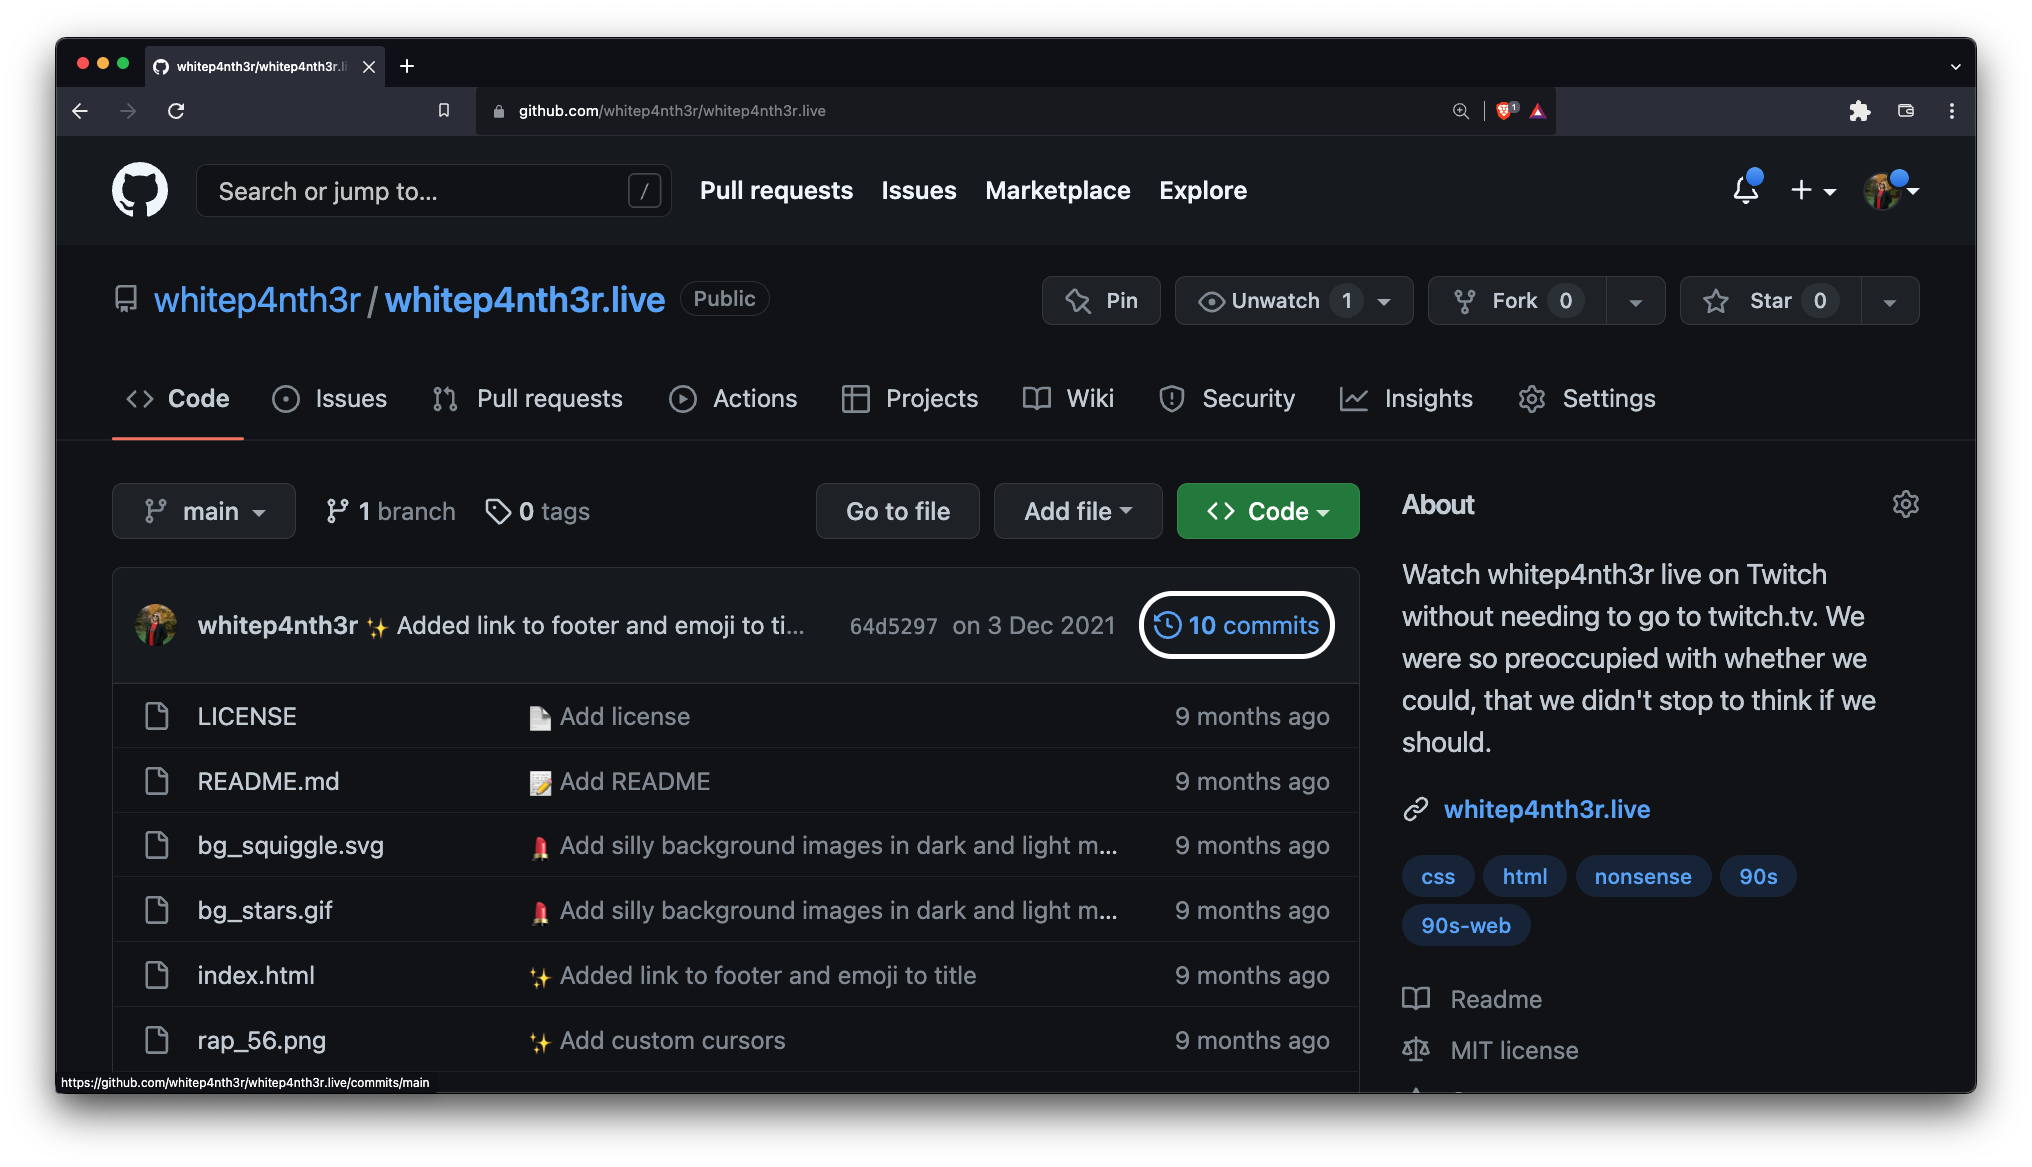
If your repository is hosted on GitHub, you can view a list of your commit hashes from the home page of your repository, by clicking on the commits link at the top right of the file list.
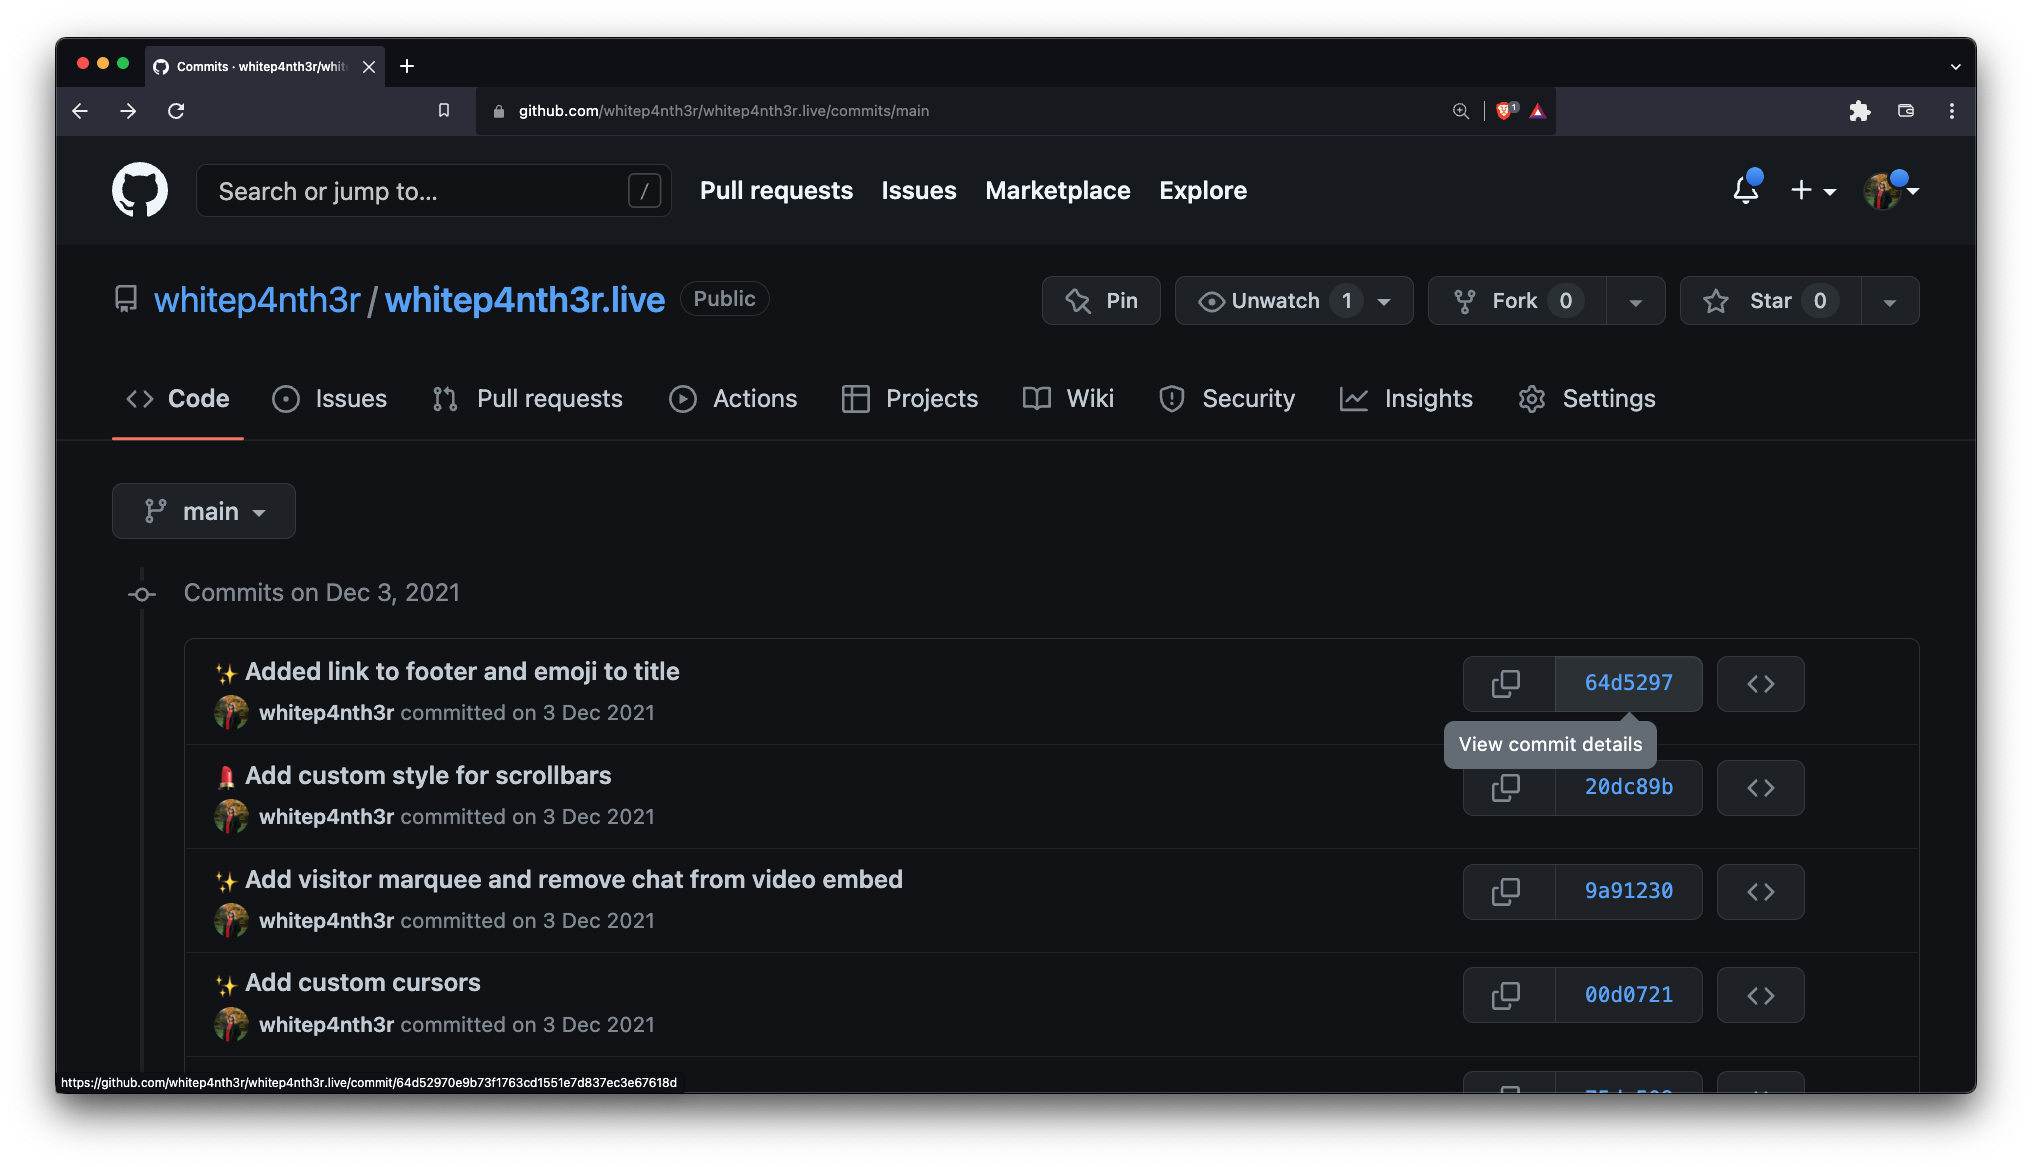
This will take you to a list of commits, showing a shortened commit hash to the right of the commit message. Scroll down to find the first commit, click to view the commit and full commit hash, or use the copy button to copy the full commit hash to your clipboard, which might look something like this: 64d52970e9b73551e7d837ec367610p.
There are ways to get the first commit hash using a terminal command, but the method may vary depending on the number of root commits in the history — which is beyond the scope of this blog post.
When you've got your initial commit hash, run the following commands in your terminal. The reset command instructs git to reset the repository to a particular state, in this case the initial commit, and the --soft flag leaves all files in their most recent up-to-date state.
# reset the repo to the initial commit
git reset --soft {INITIAL_COMMIT_HASH}

# check the status of your local repository
git status
You should now see a message stating your branch is behind the main branch by however many commits you made after the first commit, and that there are some changes to be committed.
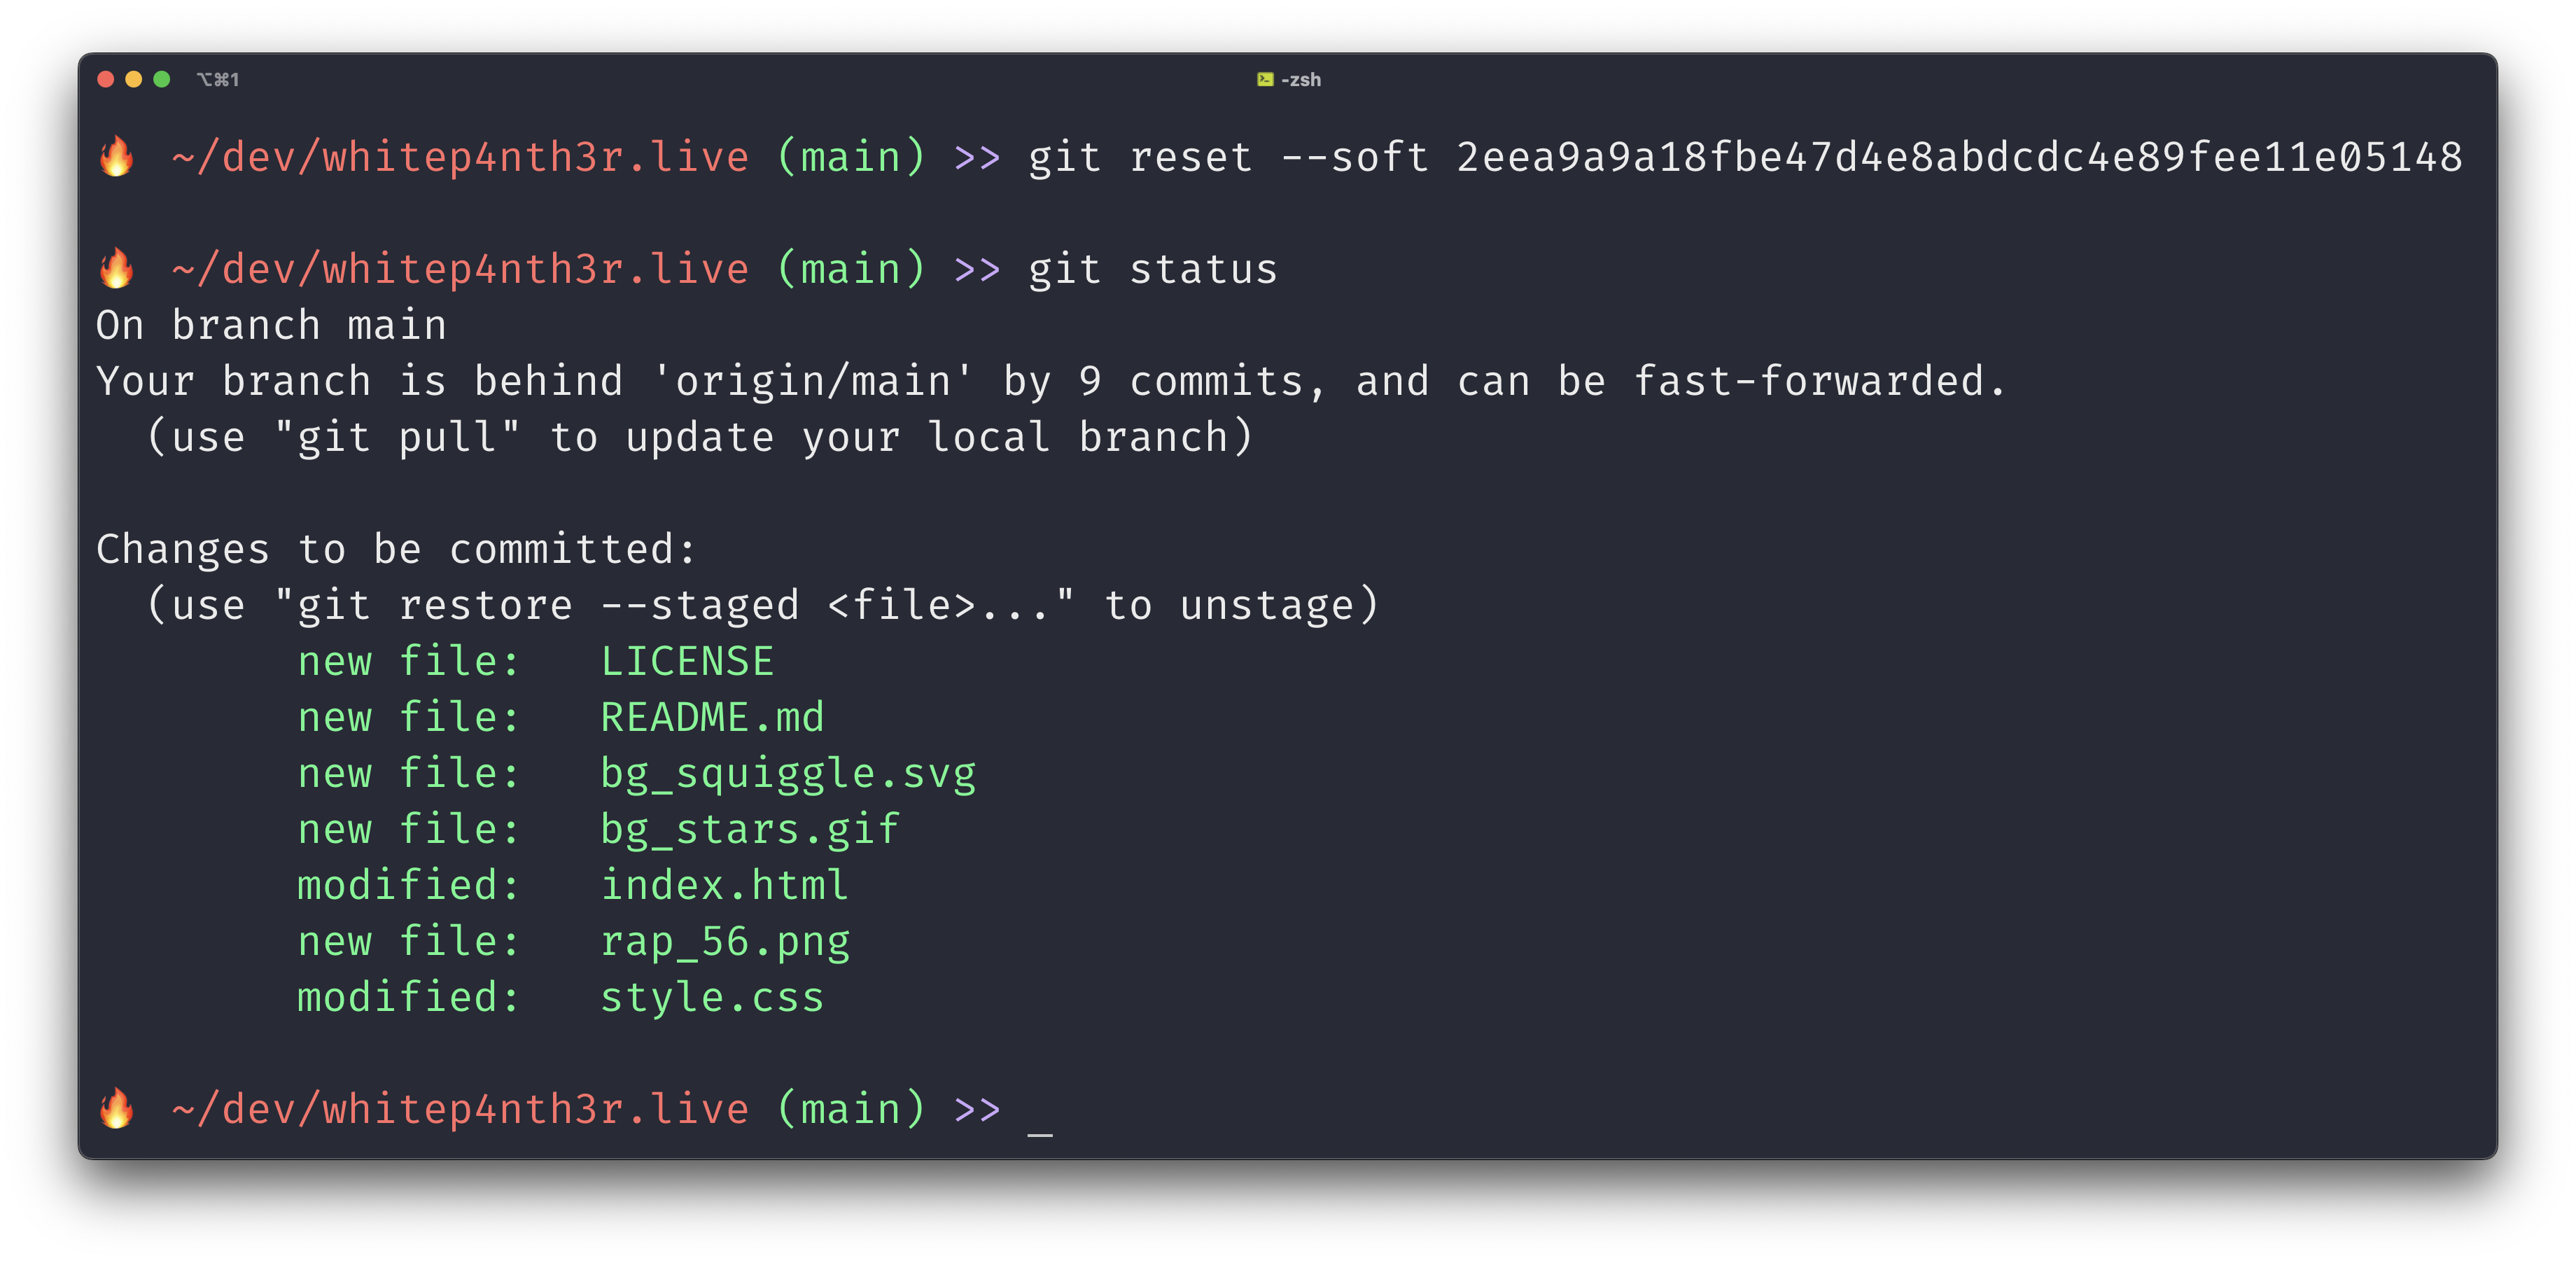
Stage all files
Next, use git add . to stage all files. Given that your .gitignore file will remain up-to-date and include any sensitive files you don't want to commit, you should be good to go. But at this point it's worth double-checking that running git status didn't list any files you don't want to add to the repository.
Make a commit
Next it's time to overwrite that history with a nice, tidy commit message. Use Initial commit or whatever commit message you'd like.
git commit -m 'I am rewriting history'Force push to the origin
It's time to push your new commit to rewrite the history using git push --force. Force pushing tells git to prioritise the changes in your local branch over the changes pushed to the remote. And this is exactly what we want to do in this case! Run the following command in your terminal, and enjoy the power it brings.
Full disclaimer that you should only force push in git when you absolutely know what you're doing, or if your project is tiny and you're the only developer working on it — like most of mine!
git push --forceAnd just like that, you've pushed a forced update to the repository.
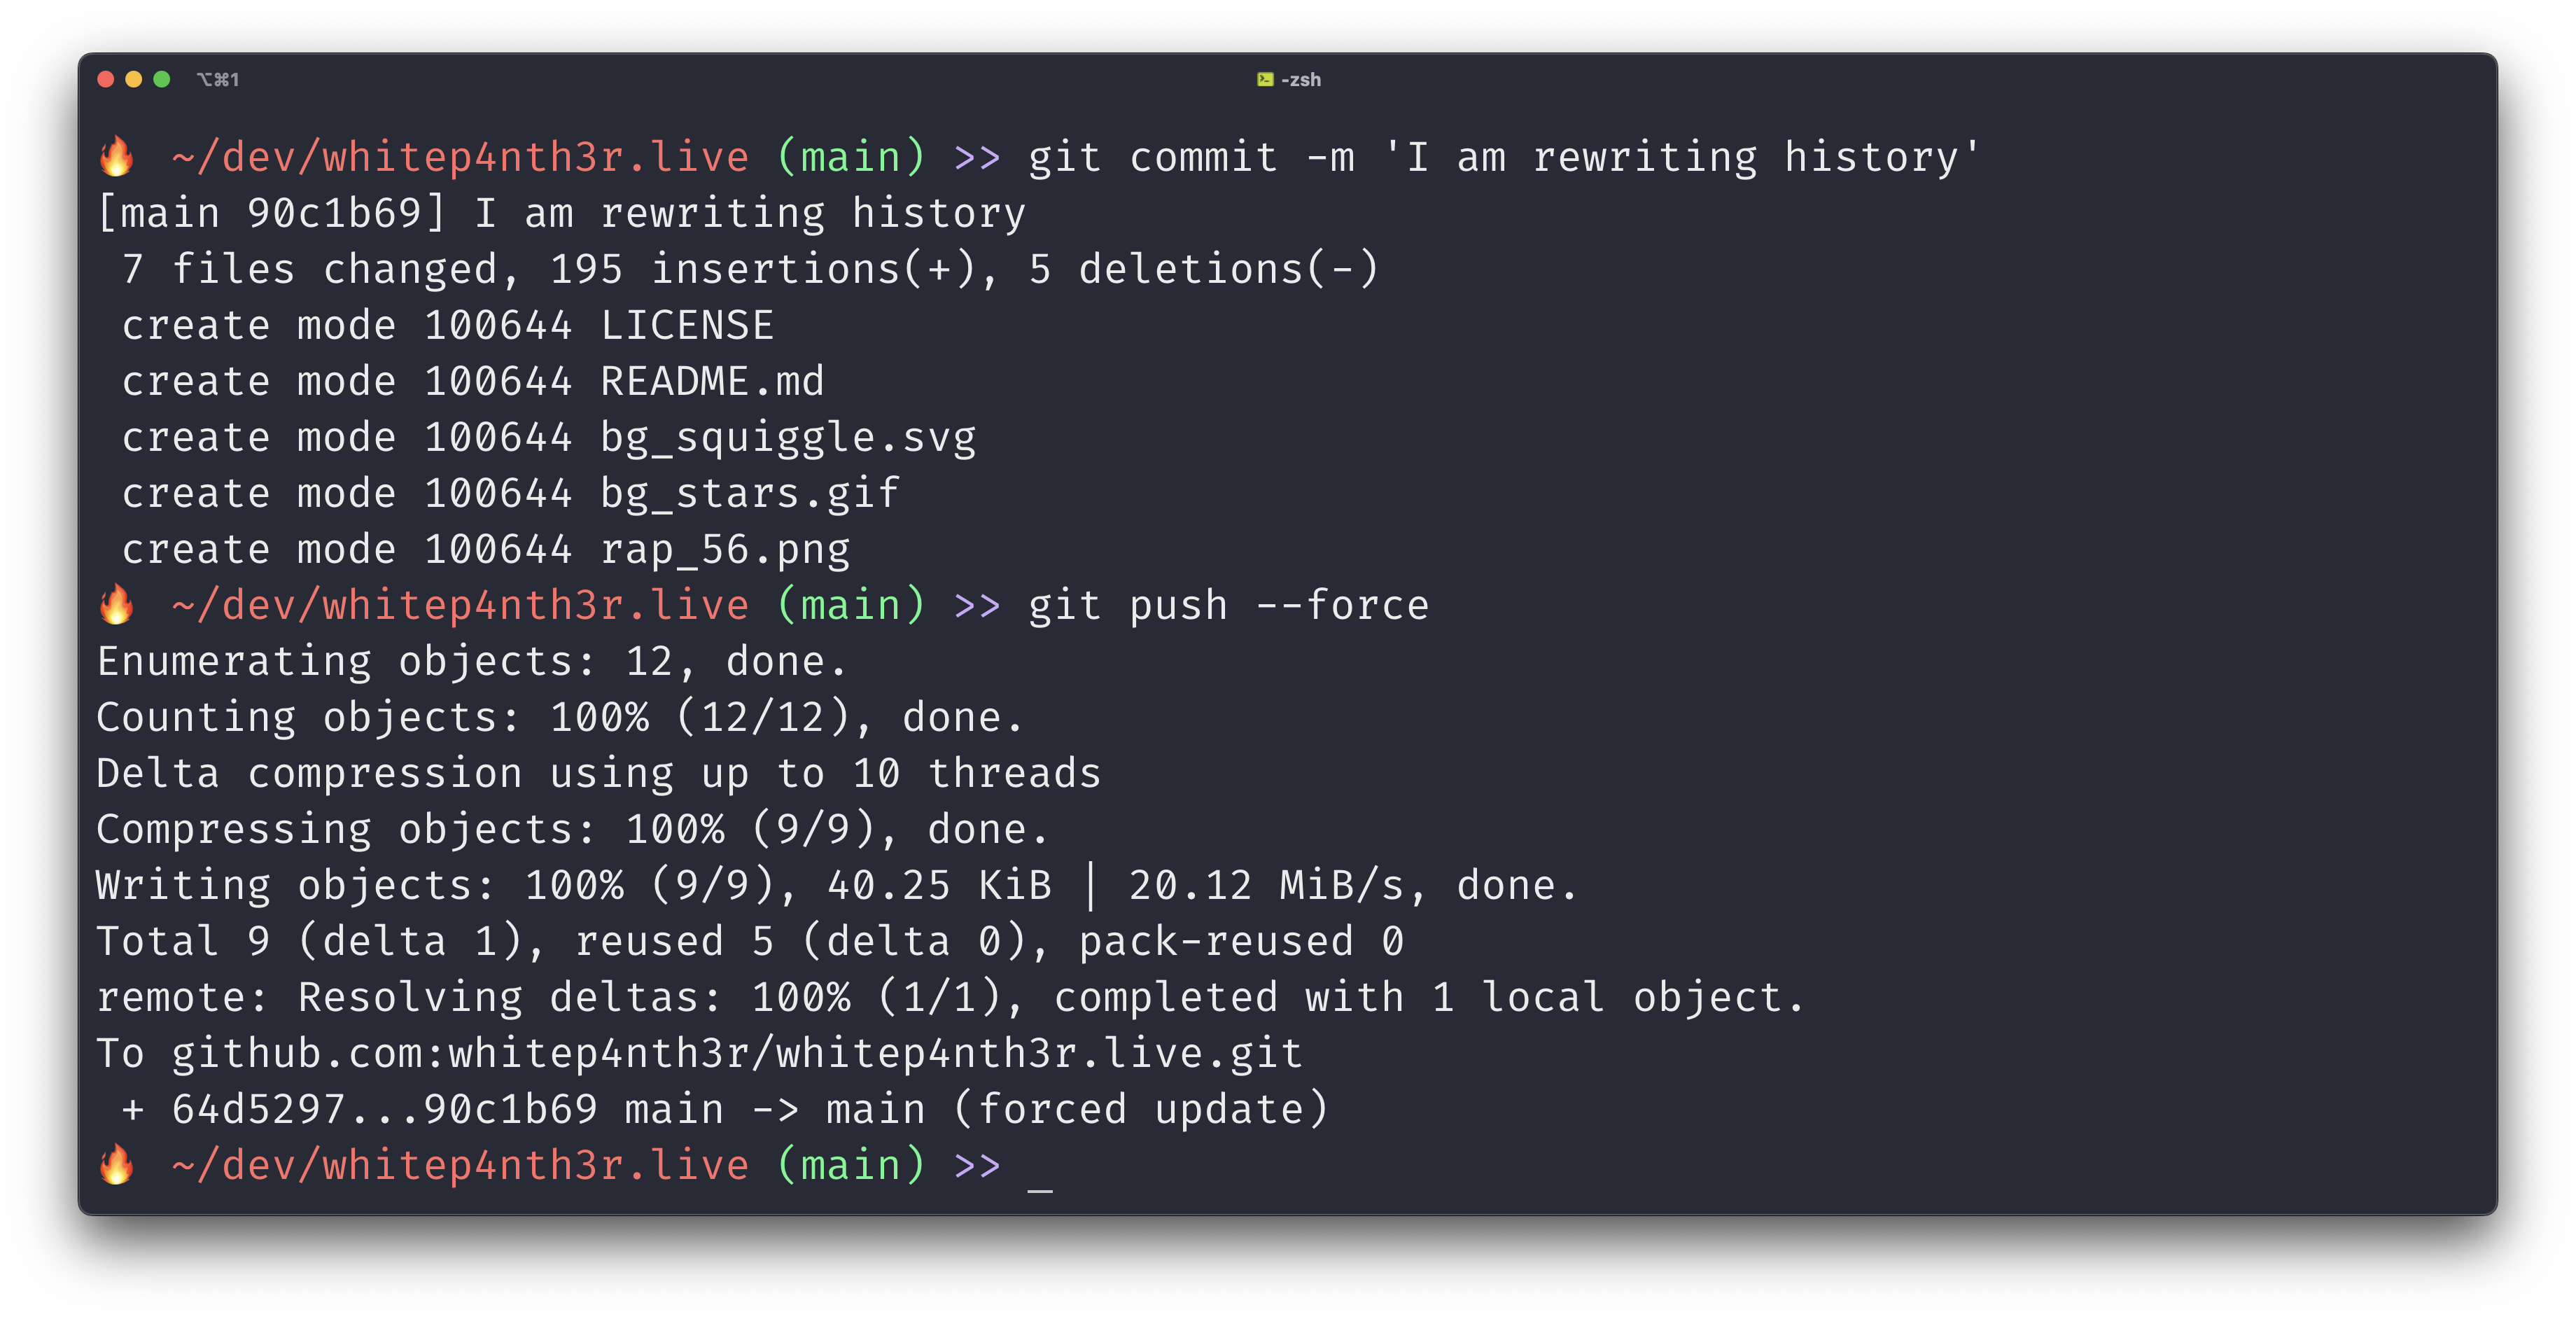
The result
Go back to GitHub and refresh the list of commits, and you'll see your shiny new commit in the commit list!
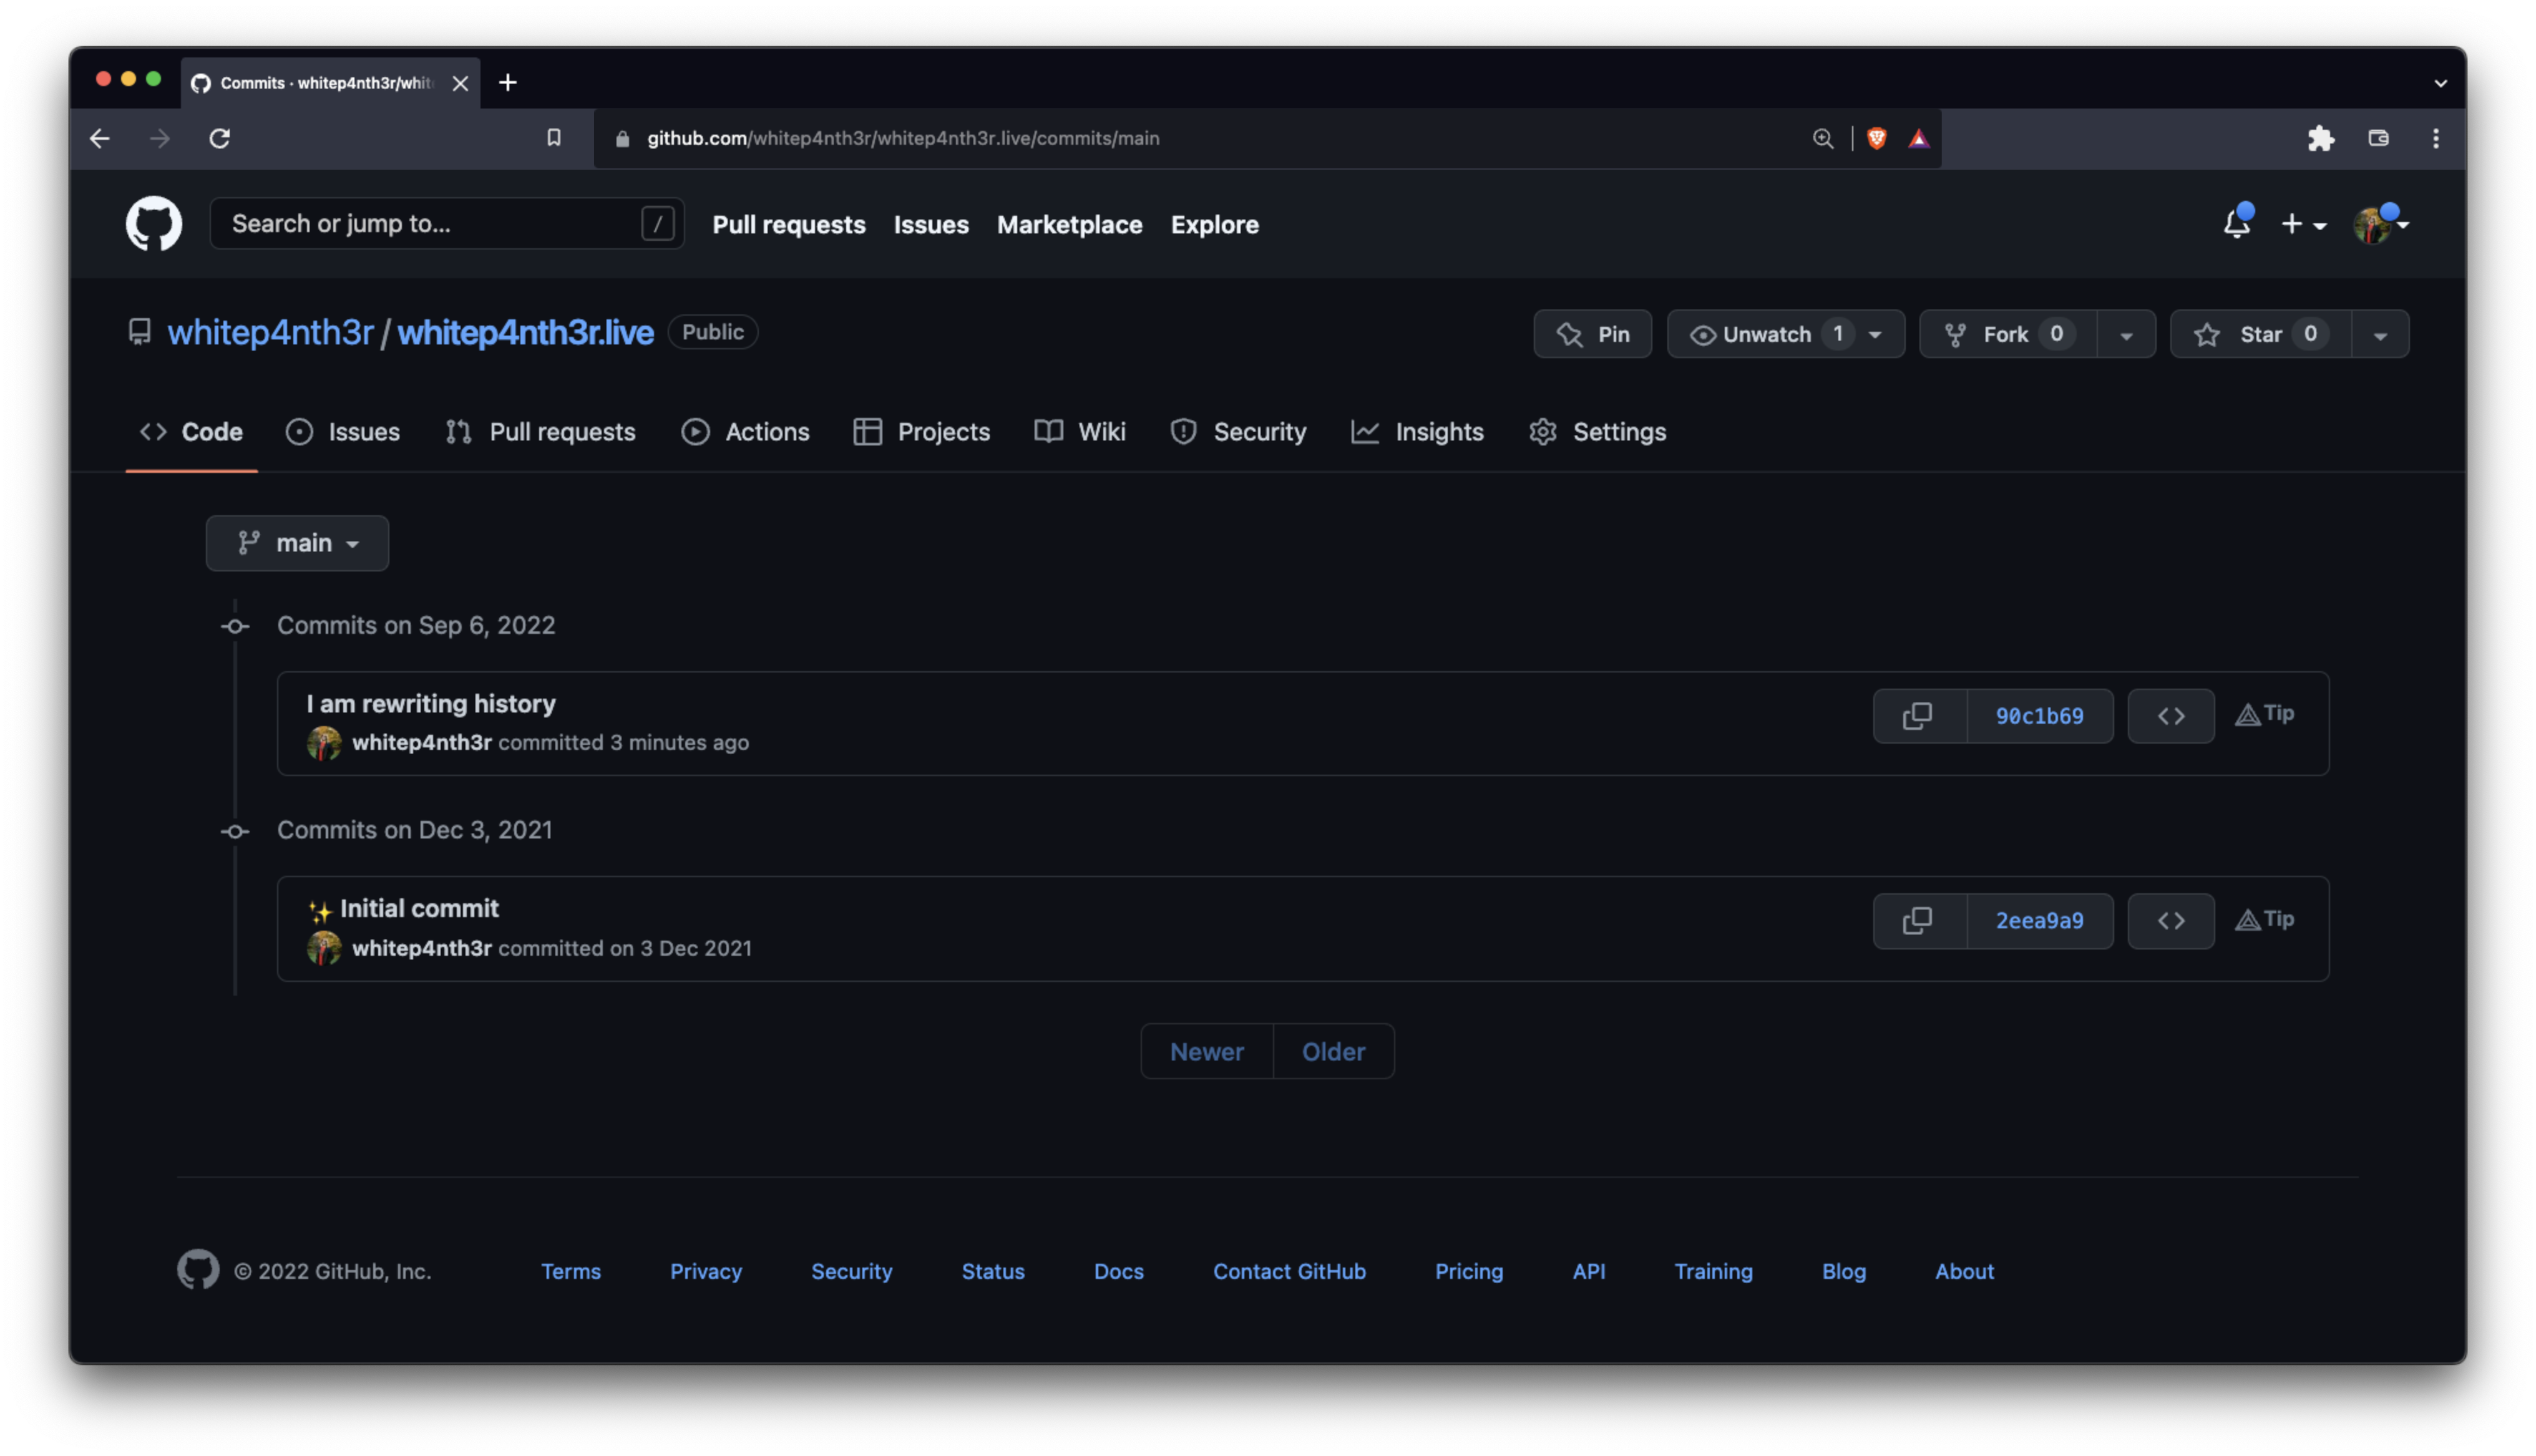
The keen-eyed perfectionists out there might notice that I now have two commits in the history rather than one single initial commit. However, for me and my purposes this a quick and friendly way to clean up my experimental git history — and gives us all a reminder that nothing in code is ever, really perfect.
If you are interested in completely resetting a git repository to its initial initial commit, the process involves a few more steps (which I think are a little less friendly). One way you can achieve this is by creating an orphan branch from main that contains all the current files, creating a single commit to that branch, and eventually replacing the original main branch with the new branch. Engineering Manager Candost Dagdeviren has a great blog post which lays out the steps.
So go forth and have a little spring clean of your git history — but please remember to do it with caution and only when you really, really need to!

Salma Alam-Naylor
I'm a live streamer, software engineer, and developer educator. I help developers build cool stuff with blog posts, videos, live coding and open source projects.
