How to generate an RSS feed for your blog with JavaScript and Netlify functions
After I built my first project with Contentful, I had no idea people would actually want to follow my content using their favorite RSS reader (thanks, Stefan Judis!). So I set out to learn how to generate an RSS feed for my microblog that’s built with no front-end frameworks.
RSS, explained
RSS (RDF Site Summary or Really Simple Syndication) was first released in March 1999. It allows people to subscribe to newly published content via an RSS reader so that they don’t need to manually check websites or channels. The myriad ways to consume content in 2021 can lead to content and sensory overload, so RSS feeds are great — Stefan Judis highlights the modern benefits of RSS in a recent Web Weekly newsletter.
”[With RSS] there’s no algorithm “curating” the articles, and I can catch up in my own time. It’s beautiful!” – Stefan Judis
An RSS feed takes the form of a standard XML (Extensible Markup Language) file, built of content and tags that define the content, and it looks a bit like HTML. XML is both human and machine readable. Its goal is to emphasize simplicity and usability across the World Wide Web. Check out the Contentful blog’s RSS feed here — it’s full of content!
Let’s build one!
There are a variety of plugins available for different platforms and frameworks that generate RSS feeds from your content. In order to stay true to the no-frameworks philosophy of my first Contentful project — thingoftheday.xyz — I wanted to explore building the functionality myself.
Note: This guide assumes you are hosting your microblog on Netlify and can make use of Netlify functions.
Thingoftheday is a static client-side application, which means the page is populated with data at the time of the request. To keep things simple, I opted for the same approach with the RSS feed and populated the XML file at run time. Rather than setting up unnecessary routing in my single page application, I decided to build a Netlify function that runs on a specified URL at the time of the request to generate and serve the XML file to the browser or RSS reader.
The building blocks of an RSS XML file
An RSS feed must contain a channel tag (which must contain a title, link and description) and item tags (which, at a minimum, must contain a title or description). We used this article from cyber.harvard.edu as a guide to what we could include.
Here’s the simplest form an RSS feed can take:

<rss version="2.0">
  <channel>
    <title>thingoftheday.xyz</title>
    <link>https://thingoftheday.xyz</link>
    <description>thingoftheday is a lightweight microblogging site powered by Contentful and vanilla HTML, CSS and JavaScript.
    </description>
  </channel>

  <item>
    <title>This is my RSS feed!</title>
  </item>
</rss>
Building the RSS feed
If you want to go straight to the finished code, click here.
I was fortunate to work with Shy on our first ever Contentful live stream together to learn about RSS and decide on the approach. In the framework-free spirit of the application, I stubbornly set out to use Node’s native HTTP functionality in the Netlify function code, which would generate the XML file. Despite our brains being reduced to mush while not being able to fetch the data before the stream ended, I moved forward undeterred the next day, and I learned a few things in the process!
Setting up the files to enable the Netlify function
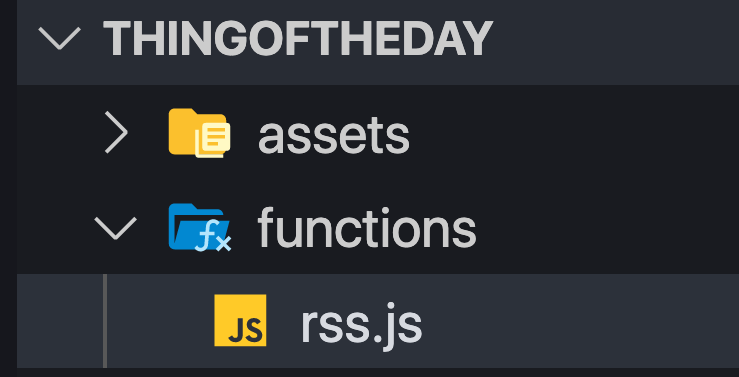
At the root of your project, create a functions directory, and add to it a new file called rss.js.

If you’d like to override the directory where you store your functions, you can do so with a netlify.toml file at the root of your project, but we’ll go with the default here. Read more about Netlify functions.
When those files are pushed to your repository, you’ll be able to navigate to `https://{hostname}/.netlify/functions/rss` to run the function. This is also where you’ll find the generated XML file later.
Constructing the XML document in JavaScript
RSS is XML. From within a serverless function in Node.js we are going to build up a string, which we will return to the browser as “text/xml” content-type. Check it out:

// Netlify functions require the exports.handler function wrapper
exports.handler = async function (event, context) {

  // Construct the required building blocks
  const rssFeed = `<?xml version="1.0"?>
  <rss version="2.0" xmlns:atom="http://www.w3.org/2005/Atom">
  <channel>
    <title>thingoftheday.xyz</title>
    <link>https://thingoftheday.xyz</link>
    <description>thingoftheday is a lightweight microblogging site powered by Contentful and vanilla HTML, CSS and JavaScript.</description>

// We’ll get to this bit later!
  ${buildRssItems(await getPosts())}

 </channel>
</rss>`;

  // Return the string in the body as type “text/xml”
  return {
    statusCode: 200,
    contentType: "text/xml",
    body: rssFeed,
  };
};
Fetching the microblog data with Node https
Here’s a function that fetches the microblogs using the Contentful GraphQL API, requesting only the data that we need for the feed.

const https = require("https");

async function getPosts() {
  return new Promise((resolve, reject) => {
    // Copy the GraphQL query from the main application code
    // Remove irrelevant data

    const query = `
    query {
      microblogCollection {
        items {
          sys {
            firstPublishedAt
            id
          }
          text
          link
          linkText
        }
      }
    }
    `;
    // Construct https options

    const options = {
      protocol: "https:",
      hostname: "graphql.contentful.com",
      path: "/content/v1/spaces/{SPACE_ID}", //add your space ID
      method: "POST",
      headers: {
        Authorization: "Bearer {ACCESS_TOKEN}", //add your access token
        "Content-Type": "application/json",
      },
    };

    let posts = "";

    const req = https.request(options, (res) => {
      res.on("data", (data) => {
        posts += data;
      });

      res.on("end", () => {
        const parsedPosts = JSON.parse(posts);
        resolve(parsedPosts.data.microblogCollection.items);
      });
    });

    req.on("error", (e) => {
      console.error(e);
    });

    req.write(JSON.stringify({ query }));
    req.end();
  });
}
Building the RSS items
Once the data had been fetched, we iterated over the posts to build the XML items, joined them all together as one string and inserted them inside the string we created in the exports.handler function.
As mentioned before, the only required piece of data in an item is either a title or description. We chose to add an author, link, pubDate and guid, as well.
2022 Update:
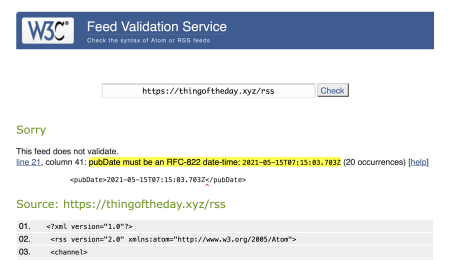
When I initially published this blog post, the pubDate tags were invalid! The code in the GitHub repository has been updated, and a small comment has been made on the code snippet below. For detailed information on valid RFC-822 dates in RSS feeds and how to build them with plain JavaScript, check out this post: How to format dates for RSS feeds (RFC-822).

function buildRFC822Date(dateString) {
  // See GitHub for full code
}

function buildRssItems(items) {
  return items
    .map((item) => {
      return `
        <item>
          <title>${item.text}</title>
          <author>whitep4nth3r@gmail.com (whitep4nth3r)</author>
          <link>https://thingoftheday.xyz#${item.sys.id}</link>
          <guid>https://thingoftheday.xyz#${item.sys.id}</guid>
          <pubDate>${buildRFC822Date(item.sys.firstPublishedAt)}</pubDate>
        </item>
        `;
    })
    .join("");
}
Viewing the feed in the browser
Once you’ve fetched your data, built the string, created your XML document and sent it as “text/xml” to the browser, you can test out your Netlify function in two ways.
Push the code to your repository, give it a minute to deploy to Netlify and hit the URL to your function in the browser (
https://{hostname}/.netlify/functions/rss).If you have the Netlify CLI installed, run
netlify devin your terminal at the root of your project. This will start up a development server where you can run your Netlify function at e.g.http://localhost:8888/.netlify/functions/rss.
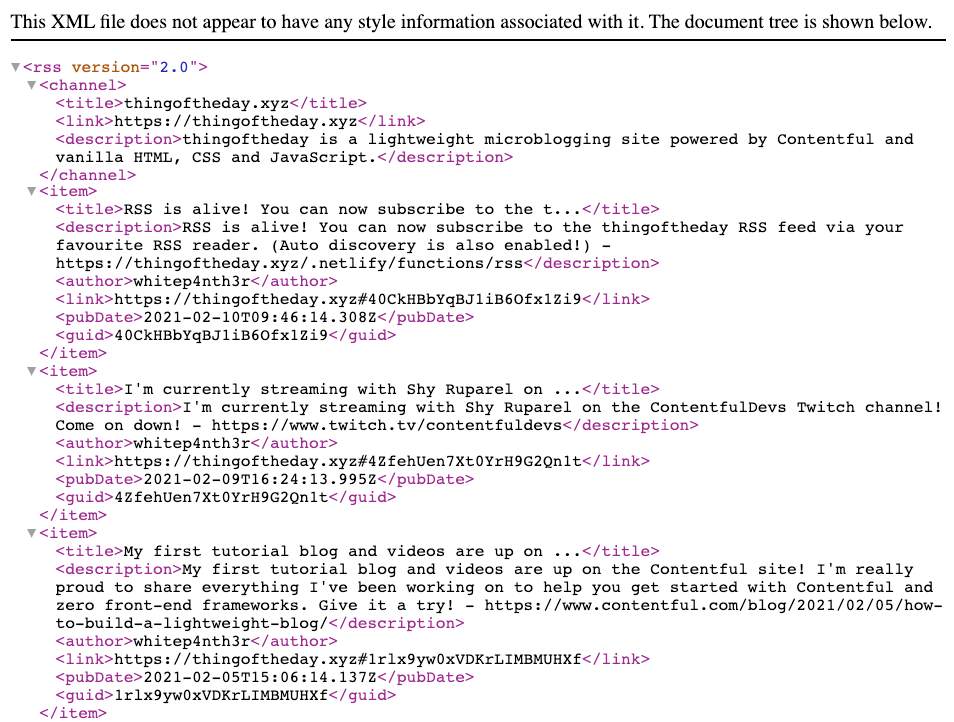
And here’s what the feed looks like in the browser:

Distribute your RSS feed link!
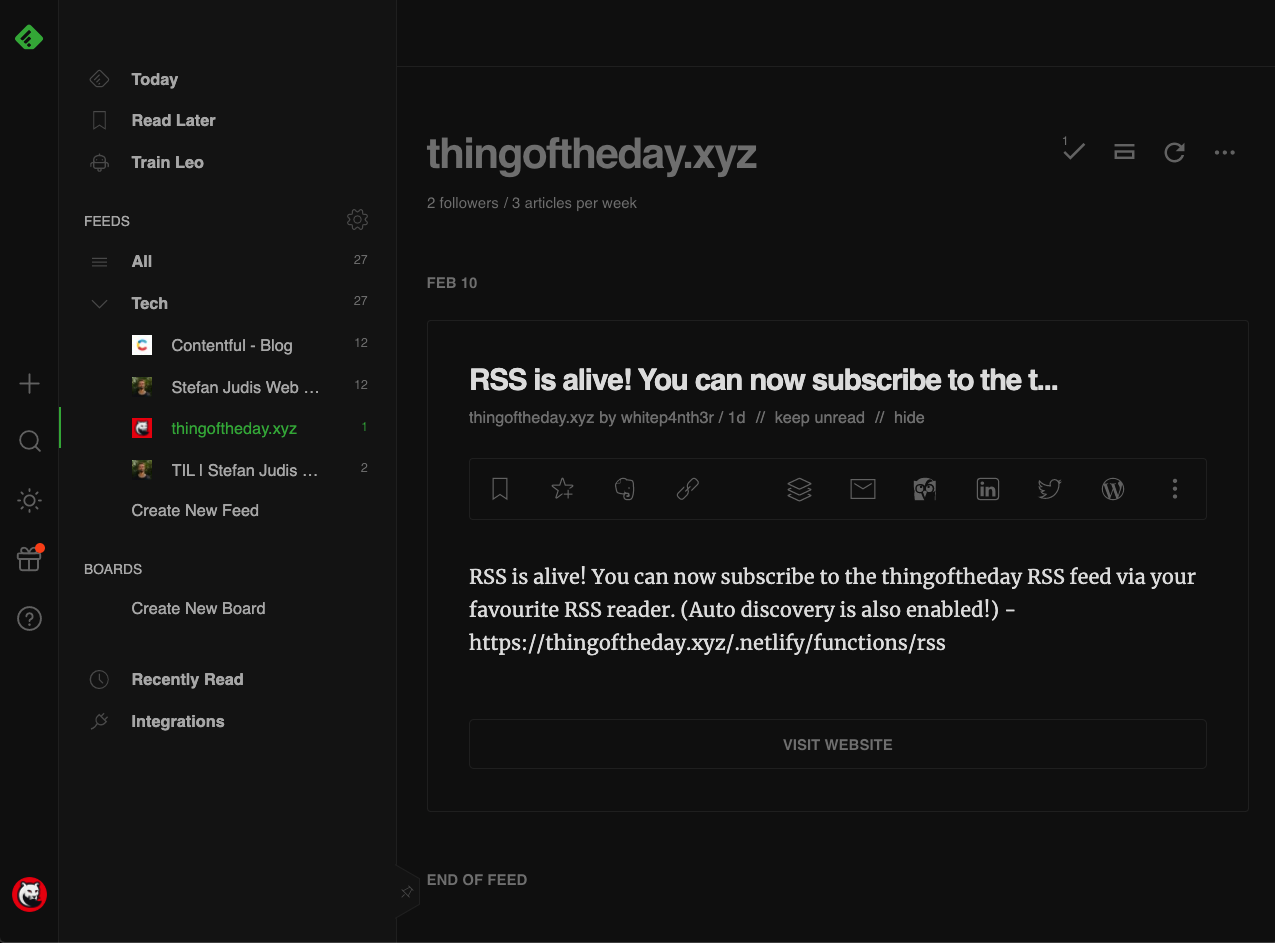
You can now keep people happy who want to follow you via an RSS reader by giving out the link to the URL that generates the XML file. Check out the RSS feed for thingoftheday here. Finally, here’s what the thingoftheday RSS feed looks like in the Feedly RSS reader.

Remember, RSS feeds, sitemaps or any other files can be generated with data returned by APIs such as Contentful’s. Fetch the data, build a string and serve the document at request time or write the file to disk. You’re in control.
Bonus content: Make your RSS feed auto-discoverable
RSS auto-discovery means that people who want to subscribe to you via an RSS feeder can enter your website URL into their RSS reader, rather than having to find the exact link to the XML file.
To enable auto discovery for your RSS feed, you can add a small snippet of code to the <head> of your index.html file, which directs readers to your feed URL, like so:

<link
      rel="alternate"
      type="application/rss+xml"
      title="RSS Feed for thingoftheday.xyz"
      href="https://thingoftheday.xyz/.netlify/functions/rss"
 />
Do I think RSS is worth it? Most definitely. If I can enable more people to access my content in whatever way they choose, then RSS is a winner. I’ll definitely be adding RSS feeds to all my future content projects — thanks again for showing me the way, Stefan!
Check out the full Netlify function file on GitHub.
And remember, build stuff, learn things, and love what you do.
Originally posted on www.contentful.com
