My blog post workflow
Cliché opener incoming.
A lot of people have asked me about my writing workflow. So here it is, including all the tools, apps and other things I use that help me produce written content. Contrary to what seems to be the norm right now, I do not use any AI tools in my workflow. I like writing directly from my brain.
0. Select topic
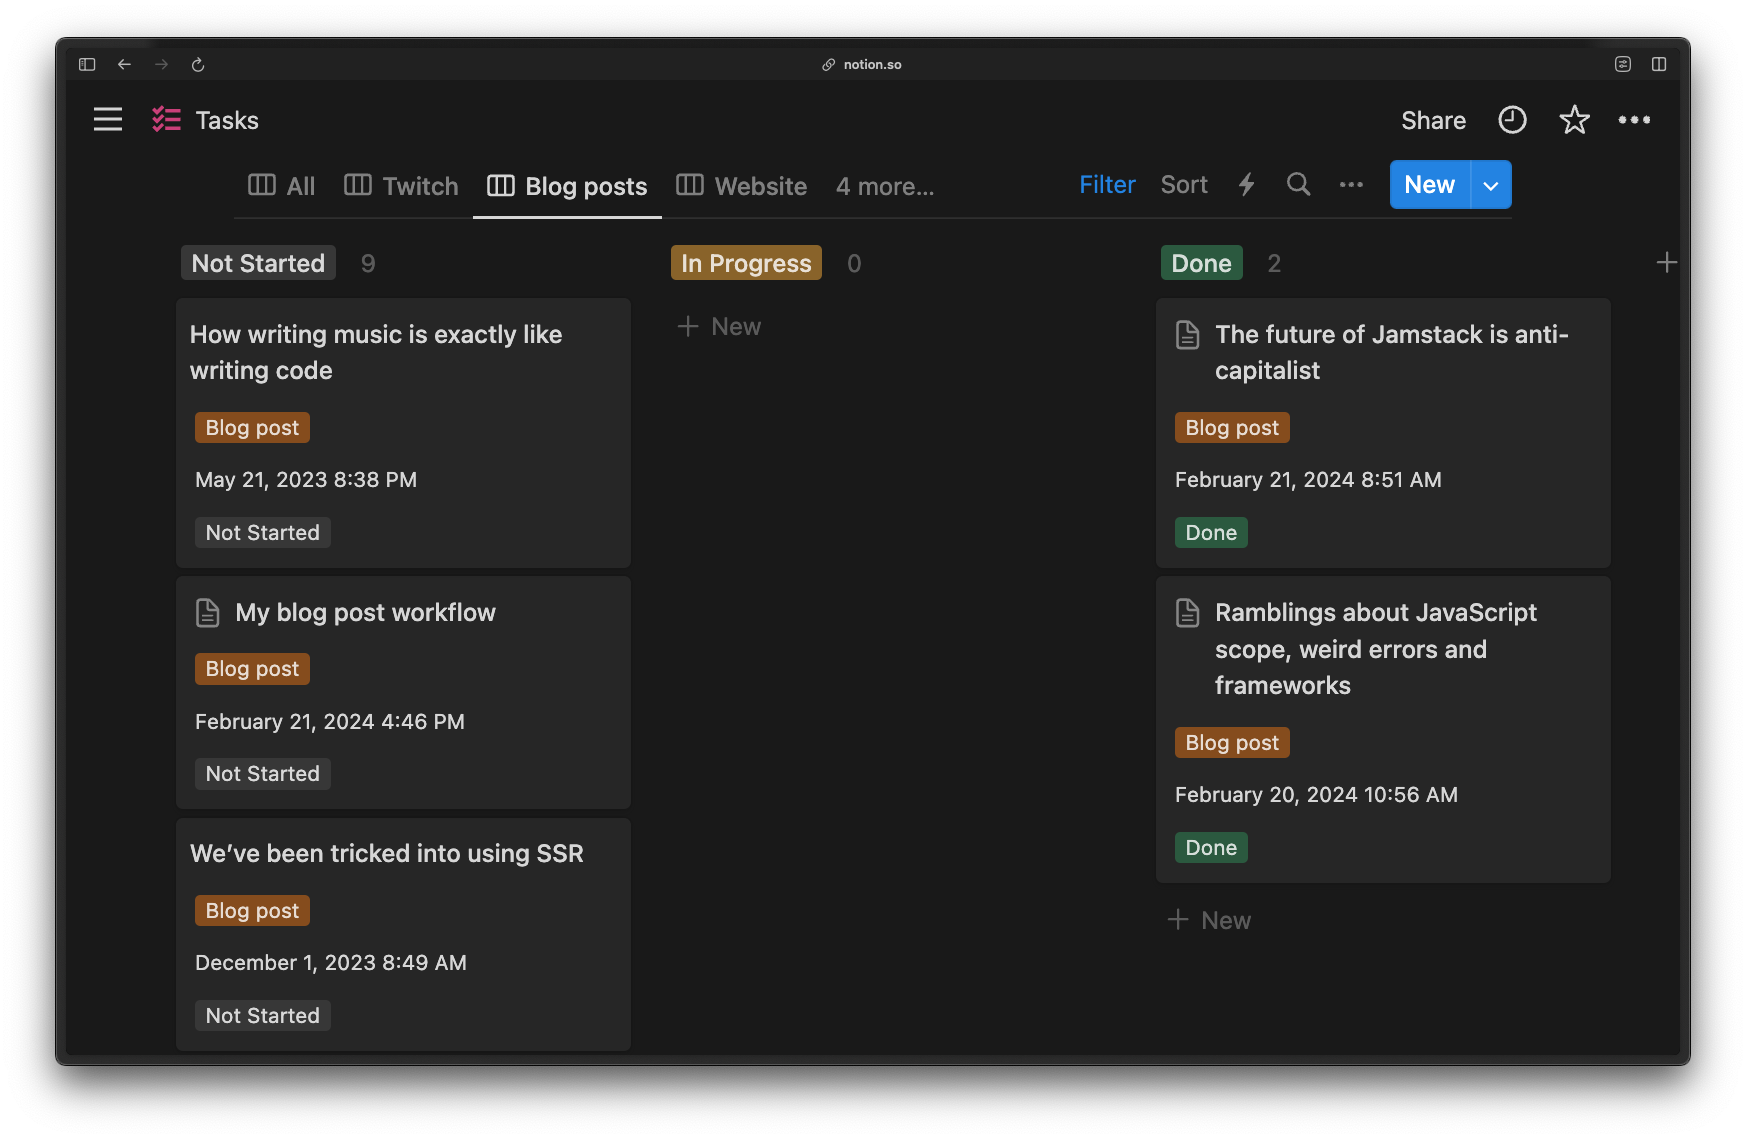
I manage my non-work and work-adjacent tasks in Notion. Whenever I have an idea, regardless of how big or small or silly or achievable it is, I'll add it to Notion, and use labels to categorise it by type of output (e.g. blog, silly project, website update). Today I wanted to write a short post for my site. I clicked on the filtered blog post view, and selected this one (because I hoped it would be a quick one!).

1. Draft in Notion
I write a full draft in Notion which includes collecting images, screenshots and code samples where required. Depending on the type of post, this could take some time; I might need to build an example project or do some further in-depth research. This post, though, was a case of just writing things I already knew.
Compared to writing directly in my CMS, using Notion makes it easier to add and edit content when the inspiration hits using mobile devices. It's also easier to do the next step.
2. Use a text-to-speech reader to make it make sense
This part is really important to me as it helps me keep my writing clear and straightforward. Currently I'm using the Read Aloud Chromium browser extension to read out my drafts to assess for spelling, grammar, and comprehension. Doing this also helps me separate myself from the words from my brain, and experience the post as a reader rather than a writer. I've tried a number of text-to-speech tools; some are better than others. Read Aloud isn't the best, but it's free, and works most of the time.
3. Add content to CMS
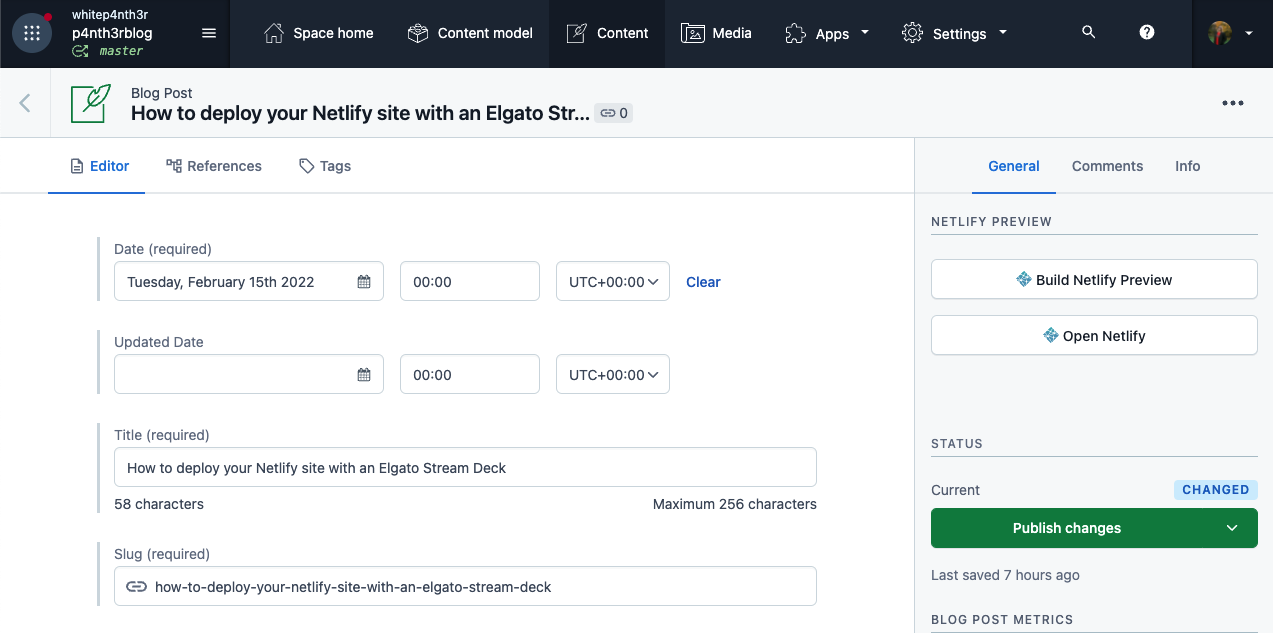
Next, I’ll copy and paste the draft text to my CMS. I’ve been using Contentful since working there in 2021. I use Rich Text rather than Markdown for my posts and what’s great about this is that copying and pasting from Notion preserves hyperlinks and formatting. If I’m including anything else like code samples, images and other embedded media, I add those as separate linked entries manually whilst working through the blog post.
4. Preview the post in the wild
In 2022 I built a custom Contentful app to build draft content to a preview branch of my static site. The app adds a button to my Contentful UI that when clicked, POSTs to a webhook that builds a specific branch of my site. Read about how I built it here: Build a CMS preview workflow for your Jamstack site.

5. Edit if necessary
Previewing content “in situ” helps me find potential formatting issues such as incorrect heading levels or weird spacing in code samples, and also encourages me, again, to experience the content as a reader, rather than a writer. At this point, I may make some slight edits to the wording. I’ll usually rebuild the preview a few times until I’m completely happy.
6. Publish
Then I hit the publish button.
7. Cross-post manually to DEV
I publish each post on my website to DEV and reference the original content with a canonical link. This step is a little painful because DEV posts are written in markdown, and as mentioned above, my posts are not. For a time I experimented with auto-importing blog posts to DEV via my RSS feed, but there are a few posts in my feed that I don’t want to post on DEV, and there was no option to hide them. This meant that I had old posts hanging around in my DEV drafts, and it felt messy.
If I really wanted, I could automate part of this step using a package that converts Contentful Rich Text to markdown. But doing this final step manually allows me to check for spelling, grammar and comprehension a third time. And yes, sometimes I’ll make edits to the post at this point and republish the changes on my site. I’m more of a perfectionist than I’d like to admit.

